

Are you looking for a simple guide which describes you how to do SEO for WordPress website? In simple and easy language without going too much technical. Do you want a step by step guide over the SEO for word-press site? Which teaches you to do SEO and optimize your website to rank well. This article is all about doing SEO in simple and easy way which drives result to your site. I have tried my best in this article to keep it simple and easy for you so that, you can learn about SEO in simple ways.
Note, This article may contain some affiliate links. These links are here not for our earnings but to provide you the best resources.
Things you will Learn
Keyword research for SEO
The beginning of SEO starts with keyword research, to read in-depth about keyword research click here.
SEO and it’s Types
basically SEO includes on page, of page and technical SEO. In on page SEO, SEO is done within the page. Like adding focused key phrase and providing meta description and page title etc. In off-page SEO, back links etc comes. In technical SEO, site speed, mobile-friendliness of page/post comes.
doing SEO with the help of plugins
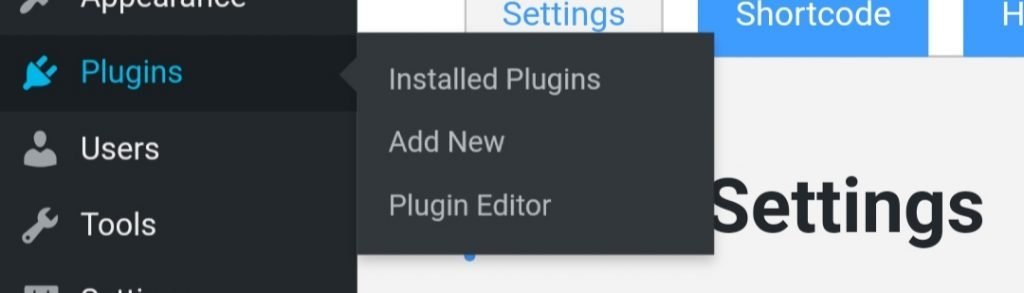
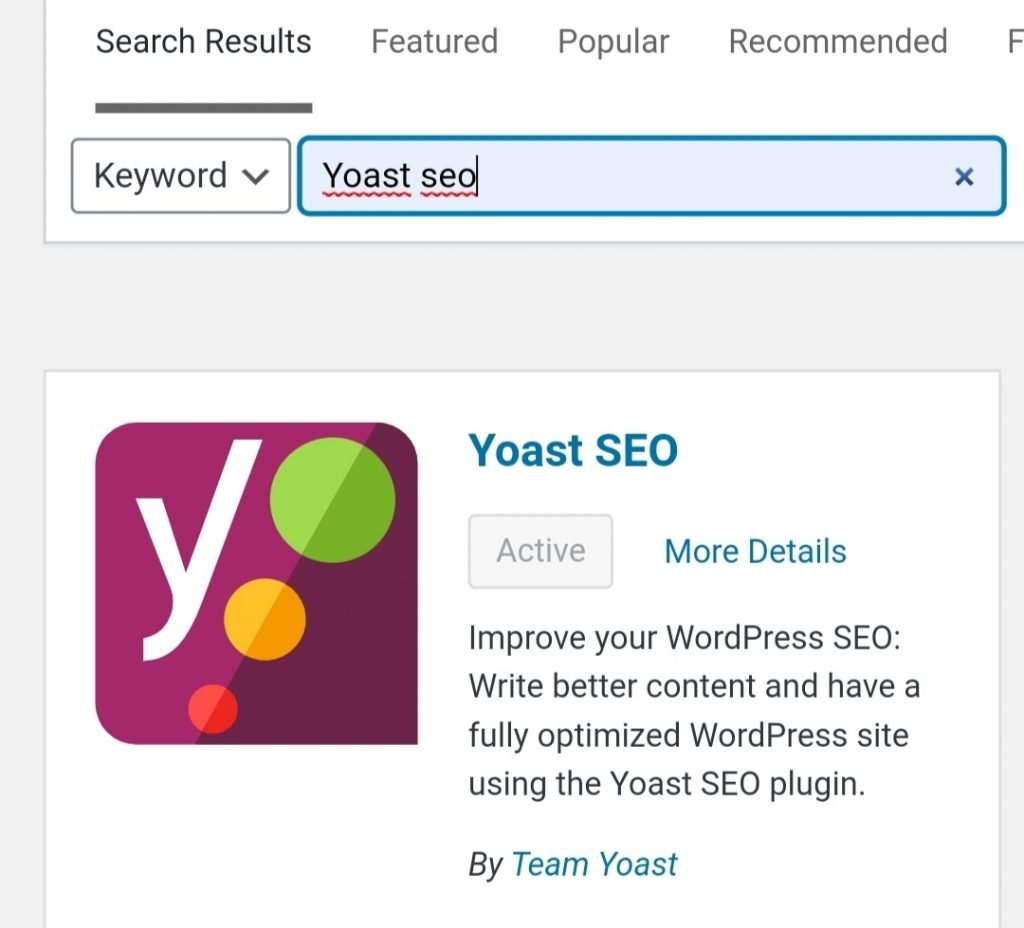
In WordPress doing SEO is so easy with the help of plugins. The best plugin which I can recommend to you is the Yoast SEO plugin. You can install and activate this plugin in the plugin section of WordPress. Just go to dashboard>plugins>add new>search Yoast SEO>install>activate.
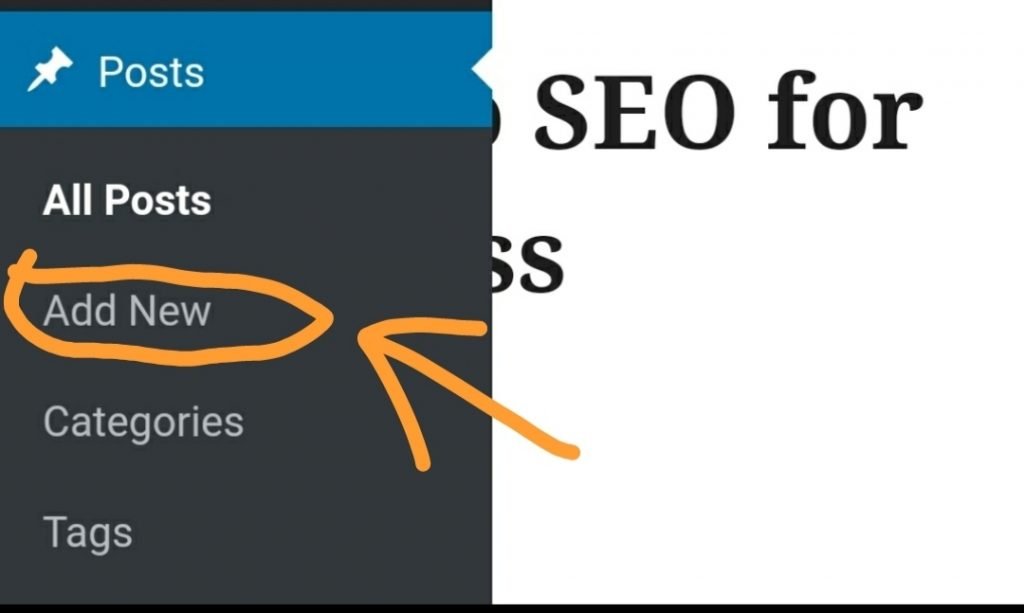
After installing the Yoast SEO plugin you will see your plugin in the WordPress dashboard and it will automatically shown under the post/page when you will create a new post/page. Now let’s start doing SEO, for it we will create a new post.
Just go to dashboard>post>add new.
After clicking to add new, you will see things like that.

On the top, you will get add title option and in the bottom you will get the Yoast SEO panel, where you can do SEO.
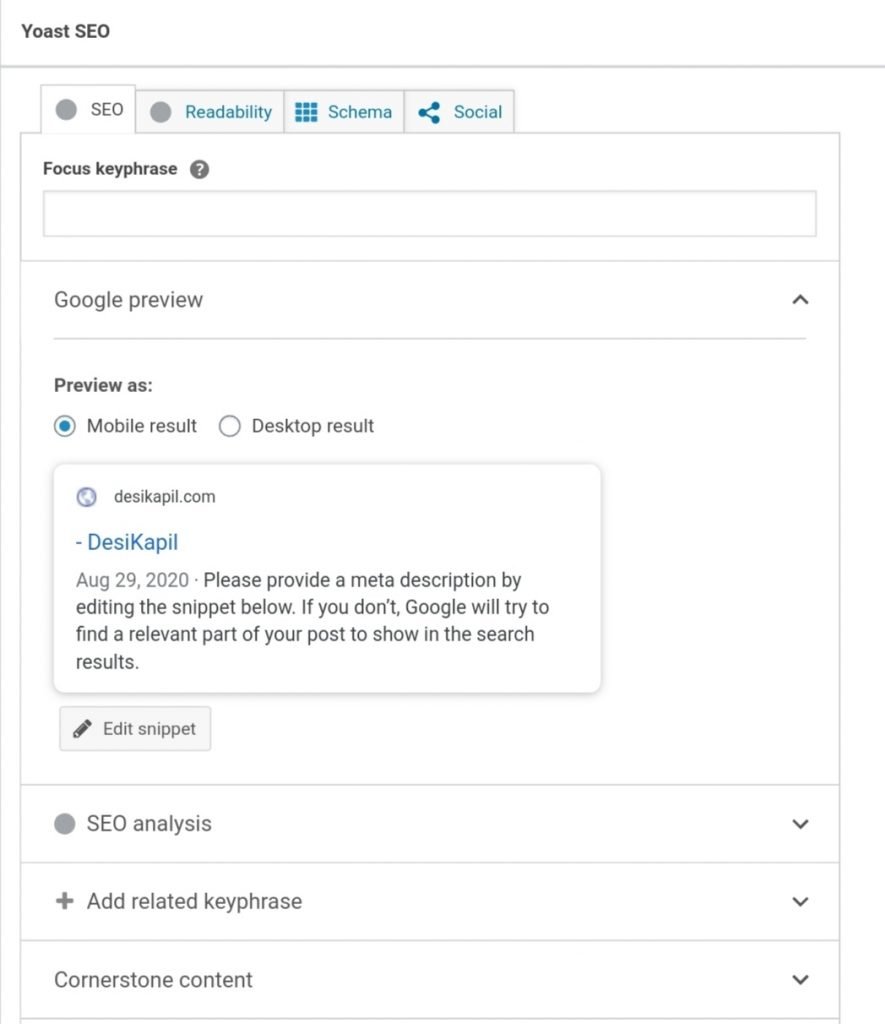
In the Yoast SEO panel, you can do your on-page SEO. Here you get four sections on the top that is SEO, readability, schema, and social. Let’s understand them one by one.
Putting Your Focused KeyPhrase
In the SEO section, you get the option of putting your focused key phrase. This means you can put your focused key phrase in this section for which you want your article to show in Google search results. For example, you are writing an SEO article then you can put your target keyword here.
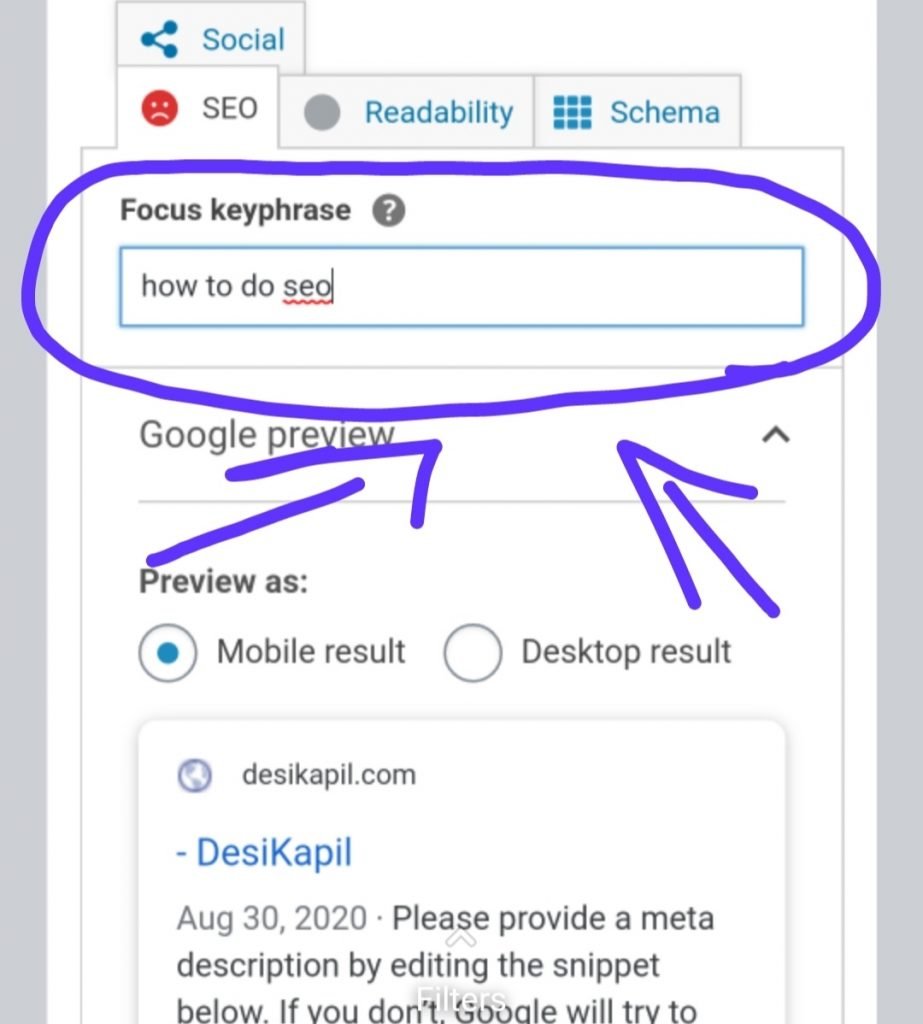
here I have put my focused key phrase “how to do SEO” here. If I come down I can see Google preview. I can see how my post will look in the Google search results and I can edit it here by clicking on the “edit snippet” button.
After clicking on the edit snippet button you will get three things SEO title, slug, and meta description.
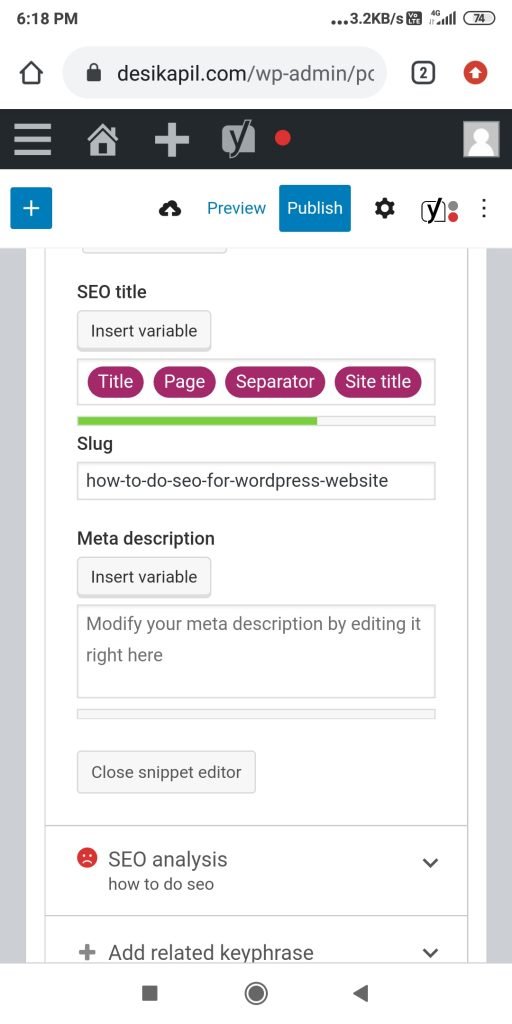
SEO Title, Meta Description and Slug
now let’s understand SEO title, slug, and meta description you can see them in the next image.

At the top or in the blue box your slug appears. In the middle or in the red box your SEO title appears. In the bottom or in the yellow box your meta description appears. And you can edit them for your post after clicking on the edit snippet button with the help of Yoast SEO.
one of my posts example is
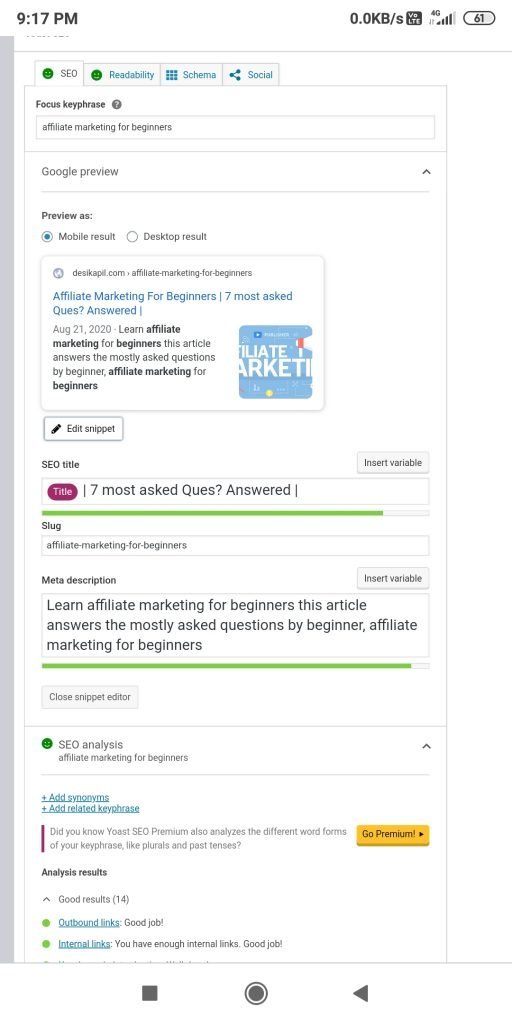
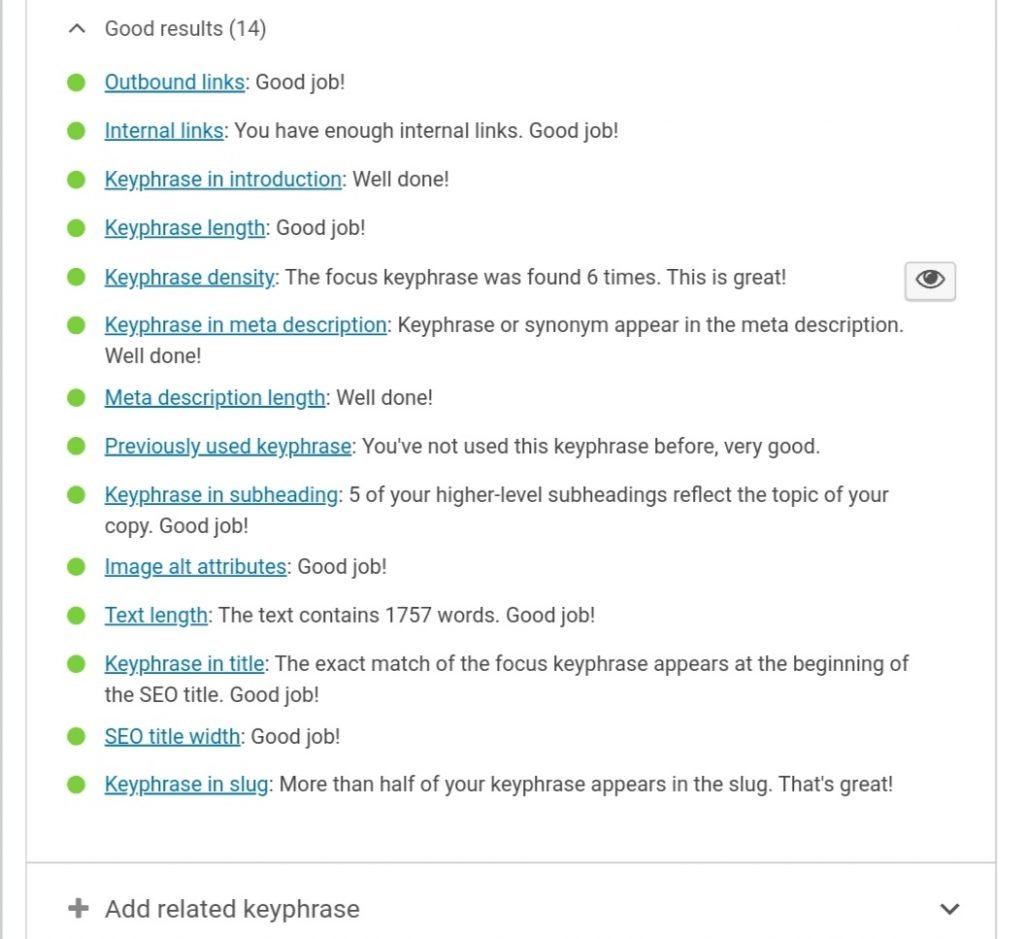
Now if you will come down below the edit snippet button you will see the SEO analysis section. In this section, you can track whether the SEO which you are doing is going right or not.
For this, you must have as much as good results which you can get from Yoast SEO.
Click on the SEO analysis and track your good results. One of my posts example is given below.
Readability analysis
In the readability analysis section, you can track whatever you are writing is well optimized or not?
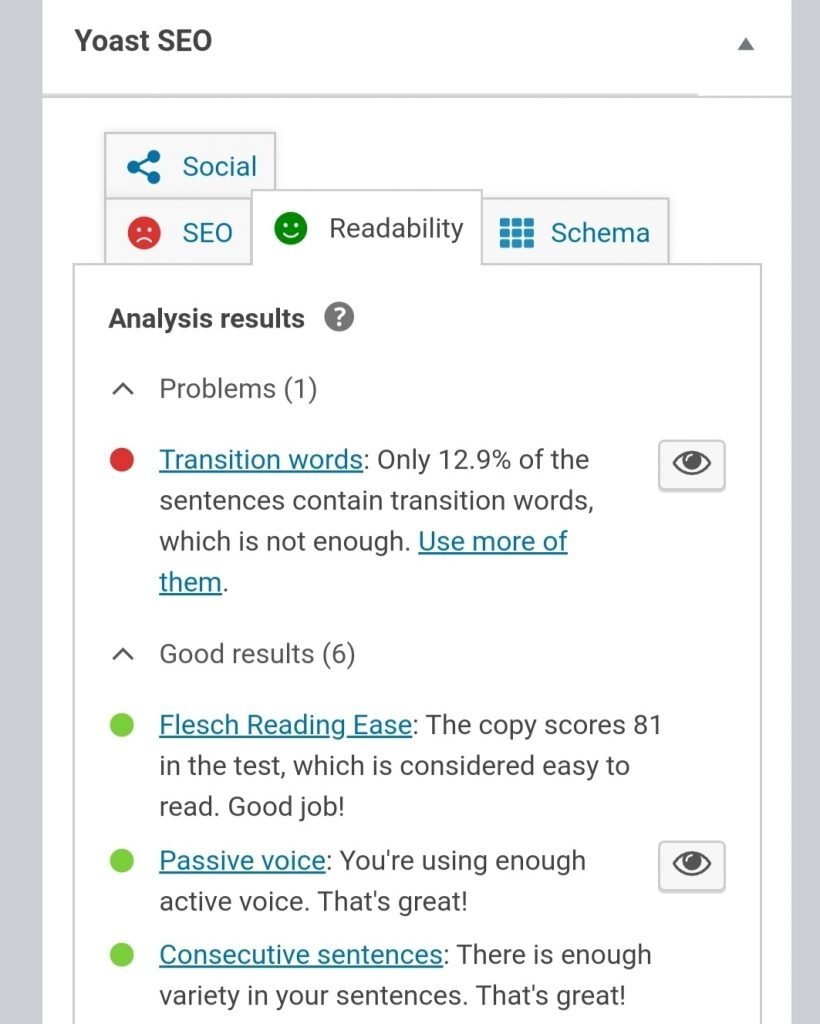
try to gain as much as green results you can so that you can get well-optimized content according to SEO.
How to index your blog/page on Google search?
You can index your blog on google search with the help of google search console. follow the given steps to index your blog to google.
Step 1: Go to google search console
Step 2; click on start now

Step 3: Login or Signup
After login/signup you will see things like that
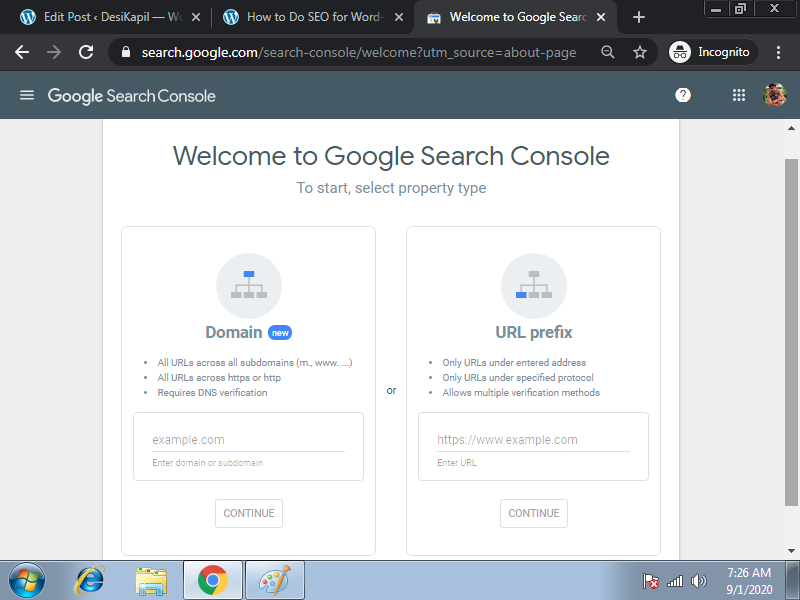
In order to start with GCC you have to add a property. for it you can do 2 things either you can add your site with the help of domain or url prefix.
we will add it with the help of url prefix. my url is https://desikapil.com so I will paste it in the url prefix section and hit on continue button.
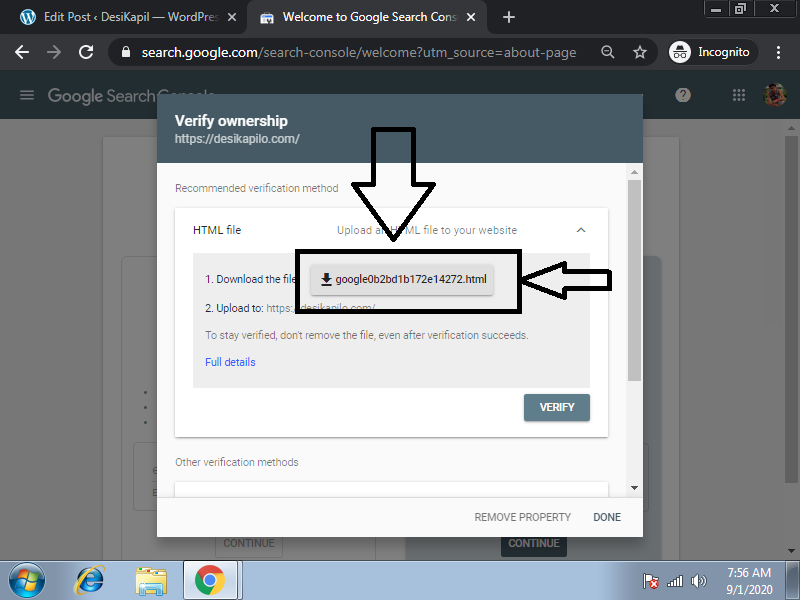
Step 4: now download the google0b2bd1b172e14272.html file.
step 5: Upload this file to the public directory of your site. if you don’t know how to upload files to the public directory read this.
step 5: after uploading the html file go back again to to google search console and click on verify.

After Verification you will reach on the dashboard of the GCC.
step 6: Click on the url inspection form the right dropdown of GCC.
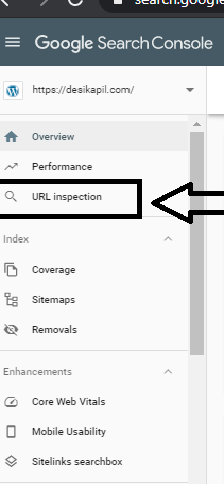
Enter your full url which you want to index to google search results. and follow the process as GCC tells you for better indexing.
How to know is your site is indexed or not
To check whether your site is indexed or not, follow this.
enter your full url on search console by adding site: before your link. for example site:https://yourdomain.com/your-blog.
if your blog appears on google than all done, your blog have been indexed. And your blog is ready to index.

