Before making any changes to your live site, it is always an obvious and wiser choice to create a backup of your WordPress Website in advance. If anything goes wrong while making changes to your live site, thank god you have a backup that you can restore to get your site back.
Well, almost every professional web developer will highly recommend you to create a backup first before making changes on your live site and they also do the same.
So, in this article, I am gonna breakdown a step-by-step tutorial on how to backup a WordPress site using the updraftplus plugin for free. If you are looking for a manual backup inside your computer without using a plugin, then you might need to read our article on How To Manually Backup WordPress Site To Computer?
Things you will Learn
UpdraftPlus WordPress Backup Plugin
UpdraftPlus is the free-to-use backup plugin for WordPress websites. You can use the UpdraftPlus plugin to backup your WordPress site, you can backup your entire website in just a few clicks and restore it in a single click.
It is free to use plugin, it has premium plans also but you can backup and restore your WordPress website with the free plan also. It is the world’s most popular and scheduled backup plugin, you can automate your backups with this plugin.
Using UpdraftPlus you can backup your website directly to the cloud such as Dropbox, Google Drive, Amazon S3 (or compatible), UpdraftVault, Rackspace Cloud, FTP, DreamObjects, Openstack Swift, and email.
How to Install Updraft Plus Plugin?
To install UpdraftPlus head over the WP-Admin dashboard then Plugins from the top-right menu. Click on add new.
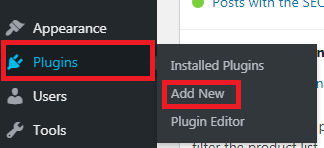
After clicking on add new, search for the “updraftplus” inside the “Search Plugins..” bar.
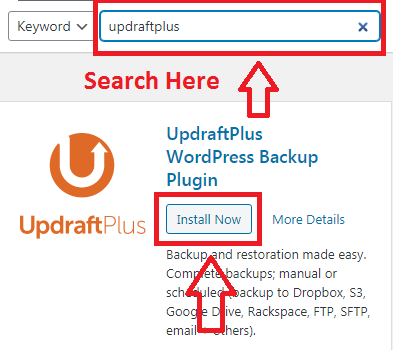
Click on Install Now then Click on Activate.
Now, you have successfully installed and activated the UpdraftPlus plugin for your WordPress site.
Now, its time to configure the UpdraftPlus Settings to take backups.
Configuring UpdraftPlus Settings
To configure the UpdraftPlus settings head over plugins>installed plugins from the WP-admin dashboard. Go to the “UpdraftPlus – Backup/Restore” plugin. Click on Settings

As you will click on settings you will reach on updraft plus configuration window. Again click on settings from the updraft plus window.

Now at the top you can see two options-

- Files Backup schedule- Here you can set the time for file backup of your website or you can put it manual.
- Database backup schedule- Here you can set the time for database backup of your website or you can put it manual.
As of now let them default to the manual, you can change them later to automate backups of your site at your desired time. You can also change the values of backups that how many backups you want to put on the cloud, by default it’s 2.
Scroll Down
Now it’s time to choose the remote storage to store the backup of your site.

I am going to choose Google Drive in this article, you can choose your desired remote location.
After choosing the remote location Scroll Down.
From the “include files in backup” option you can choose whether which files you want to backup and which you don’t want. By default it’s set to all.

Now scroll down and click on Save Changes.
As you will click on save changes you will see a popup message.
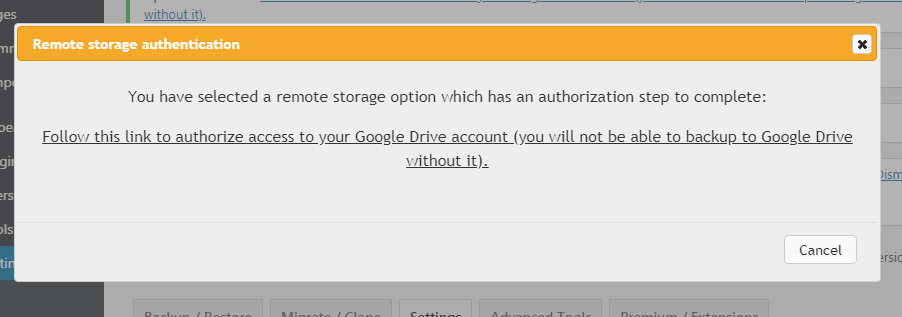
This popup message means:- you need to authorize with the remote location which you have selected. This is the authorization step.
To get authorized click over the link inside this popup message.

After clicking the link you need to choose the account at which you want to backup your site. And you need to allow all the account permission. (if you are choosing the remote location as Google Drive. You have to choose the Google account at which you want to store the backup)
Then click the complete setup button.
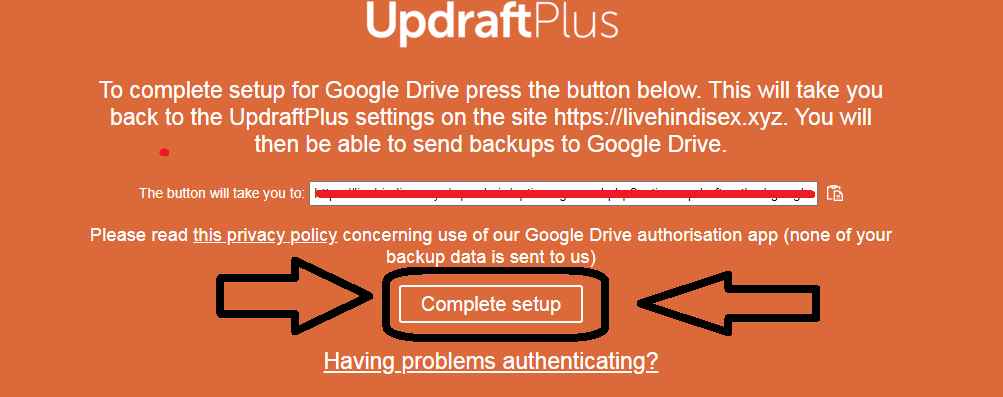
Now the setup has been completed and you are ready to take the backup for your website.
how to backup WordPress site using UpdraftPlus Plugin?
After setting up the updraft plus plugin you can take the backup of your site.
To backup your site head over the WP-admin>Plugins>Installed Plugins>UpdraftPlus – Backup/Restore > Click on settings.
Choose the Backup/Restore tab then click the Backup Now Button.
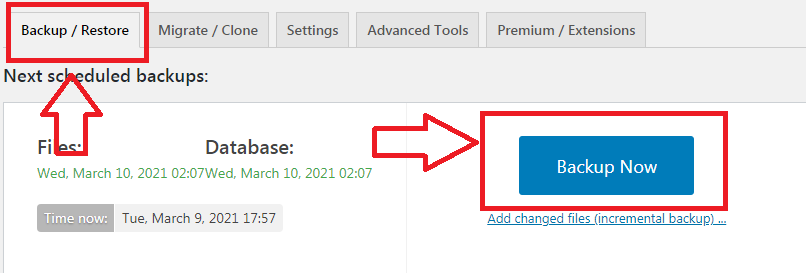
As you will click on the Backup Now button, you will see a popup. Here you can select which file you want to backup and which files you want not to backup. if you only want to backup the files then you can uncheck the database. If you want to backup the database only then you can uncheck the files. Always check “Send this backup to remote storage”. Fourth option is to keep the backup or not inside the remote storage when the retention limit is reached.

Click on Backup Now button.
As you will click the Backup Now Button this will start creating backup for your site, wait for a few minutes. You will get a success message.
Now scroll down to see the backup which you have created.

How to Restore Updraft Plus backup?
After creating the successful backup of your site using UpdraftPlus plugin. If you need to restore it you can do it in just few click.
To restore the backup move to the backups inside the updraft plus then follow the instructions below.

Click on Restore button.
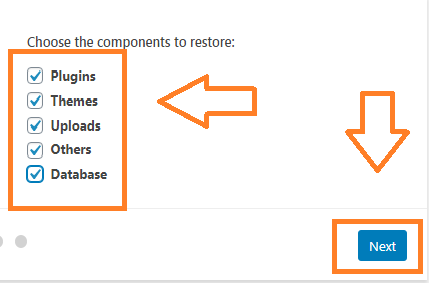
Choose the components which you want to restore (you can choose all of them).
Click on Next.
It will start downloading the backup files. wait until it finishes.
If everything will go right you will get a success message,

Click on Restore.
it will start restoring the backup to your live site.
Note:- while restoration if you get an error message to delete old directories, delete them first to restore your backup by clicking on the delete old directories button.
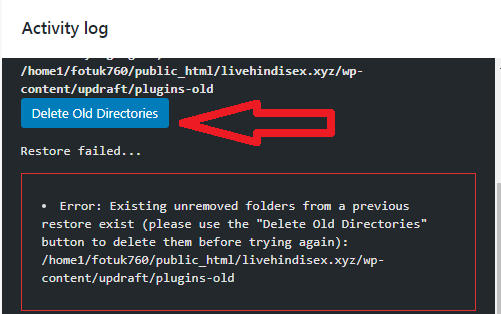
You are getting this message because you have created some directories or files after taking the backup. So in order to restore the backup, you need to delete them first. after deleting the old directories. Restart the restoration process again. At this time you should see a successful message.


![Read more about the article 2 Easy Ways Backup & Restore WordPress Database [Step-By-Step]](https://www.desikapil.com/wp-content/uploads/2021/03/How-To-Backup-WordPress-Database_-compressed-300x160.jpg)
![Read more about the article 7 Best WordPress Backup Plugins Compared [ Free And Paid ]](https://www.desikapil.com/wp-content/uploads/2021/04/WordPress-Backup-Plugins-Comapred-1-compressed-300x200.jpg)